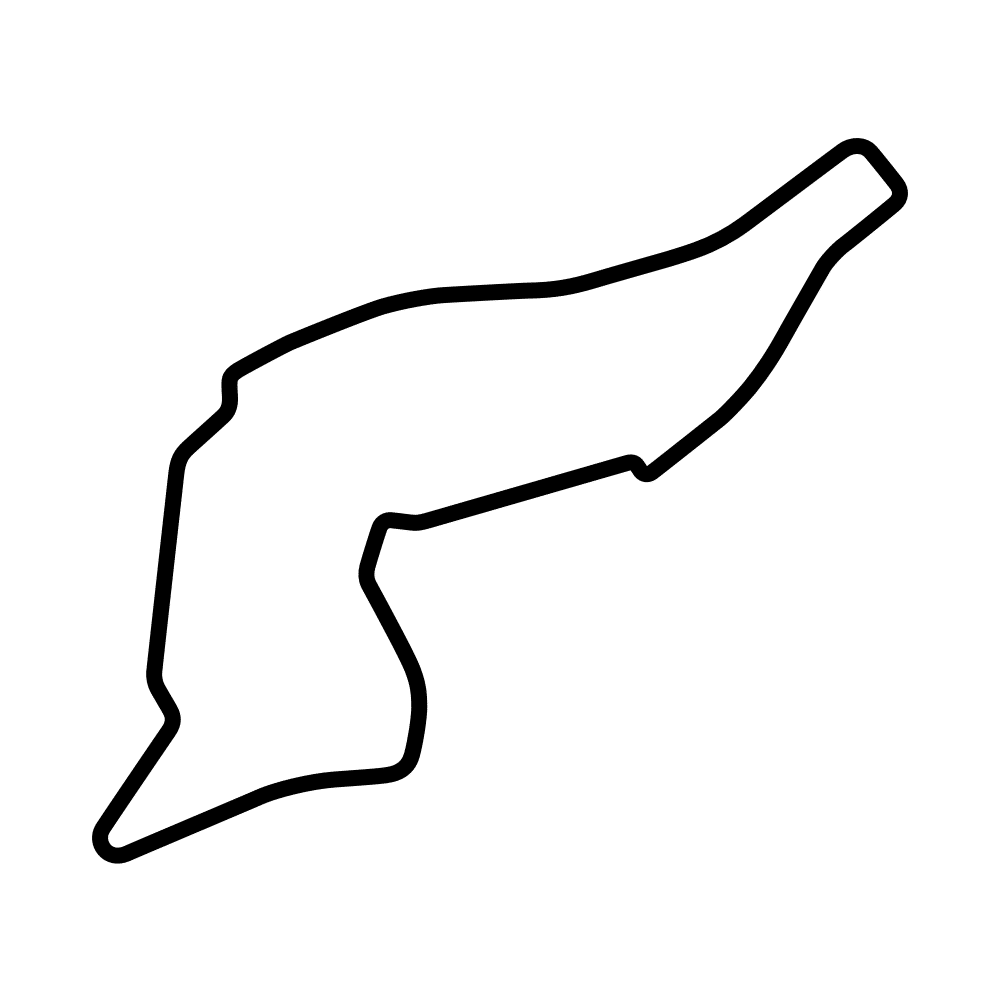
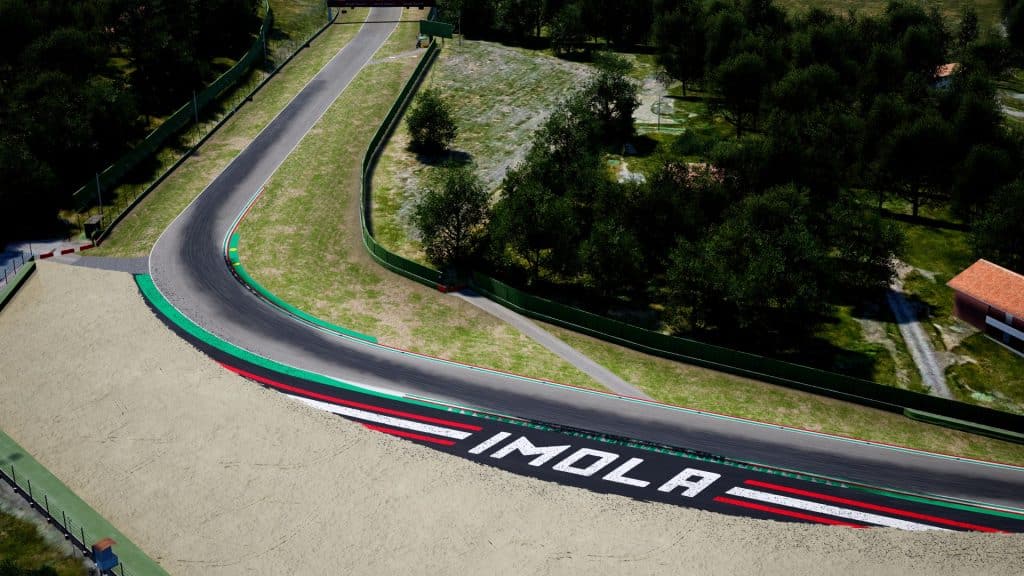
The Imola circuit, officially known as the Autodromo Enzo e Dino Ferrari, is an iconic race track steeped in history located in Imola, Italy. Here are some facts and history about the circuit:
- The circuit was opened in 1953 and was initially called the “Autodromo di Imola.” It was later renamed in honour of Enzo Ferrari, the founder of the Ferrari car company, and his son Dino.
- The track is 4.9 kilometres in length and has a total of 19 turns. It is a relatively narrow and technical circuit, which makes it challenging for drivers to overtake one another.
- The Imola circuit has a rich history in motorsports. In addition to Formula One, it has hosted a variety of other races over the years, including motorcycle racing, touring car racing, and endurance racing.
- One of the most infamous incidents in the history of the Imola circuit occurred during the 1994 San Marino Grand Prix, when three-time world champion Ayrton Senna was killed in a crash while leading the race. The circuit was subsequently redesigned in an effort to improve safety.
- In recent years, the Imola circuit has hosted a variety of other major motorsports events, including the Superbike World Championship, the Blancpain GT Series, and the European Le Mans Series.
- In 2020, the Imola circuit returned to the Formula One calendar for the first time in 14 years, hosting the Emilia Romagna Grand Prix as a replacement for races that were cancelled due to the COVID-19 pandemic.
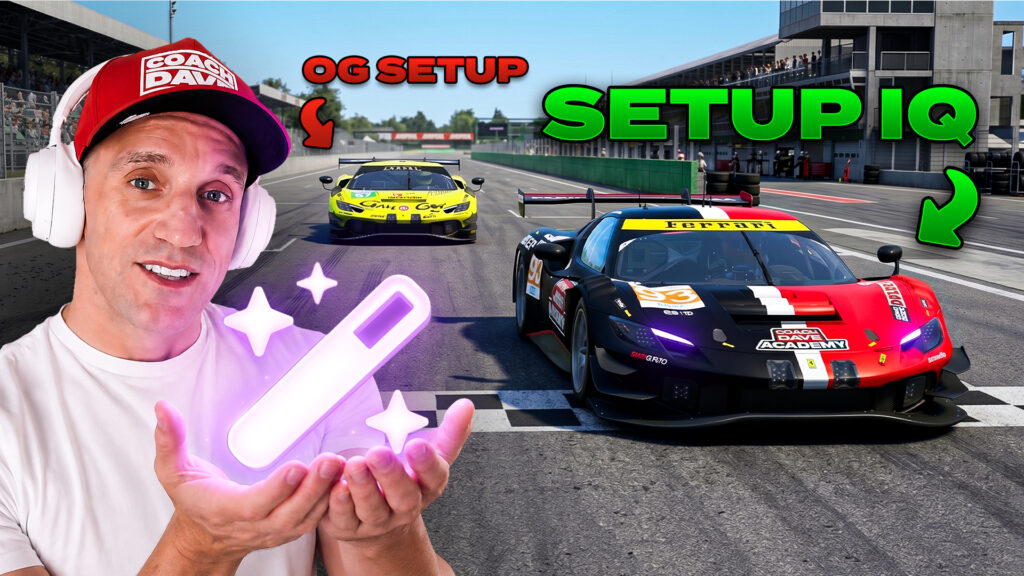
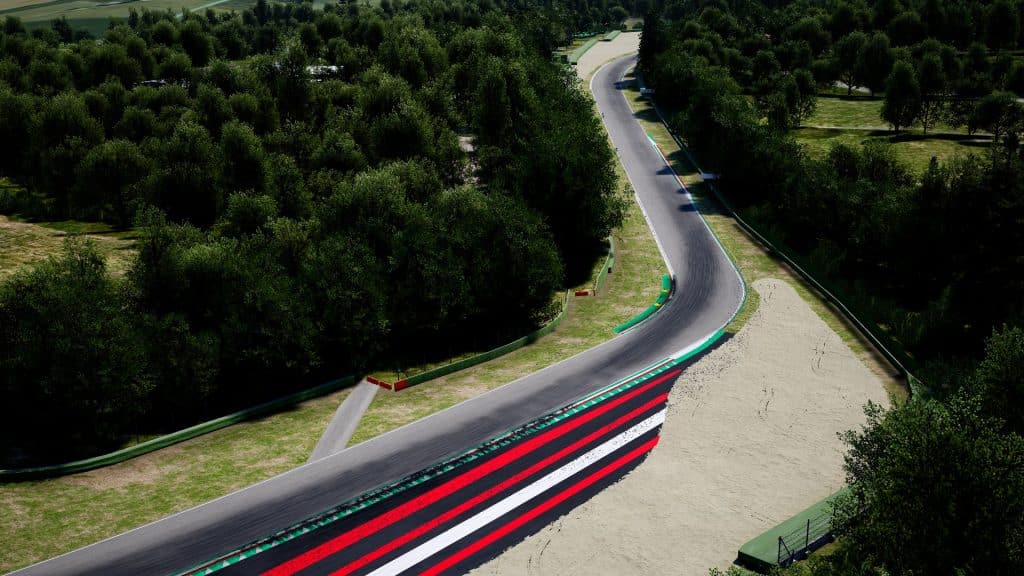
In this track guide, we will break down each corner of the Autordromo Enzo e Dino Ferrari circuit to give you a better understanding of how to attack this flowing, undulating and high-speed circuit. Let’s get stuck in.
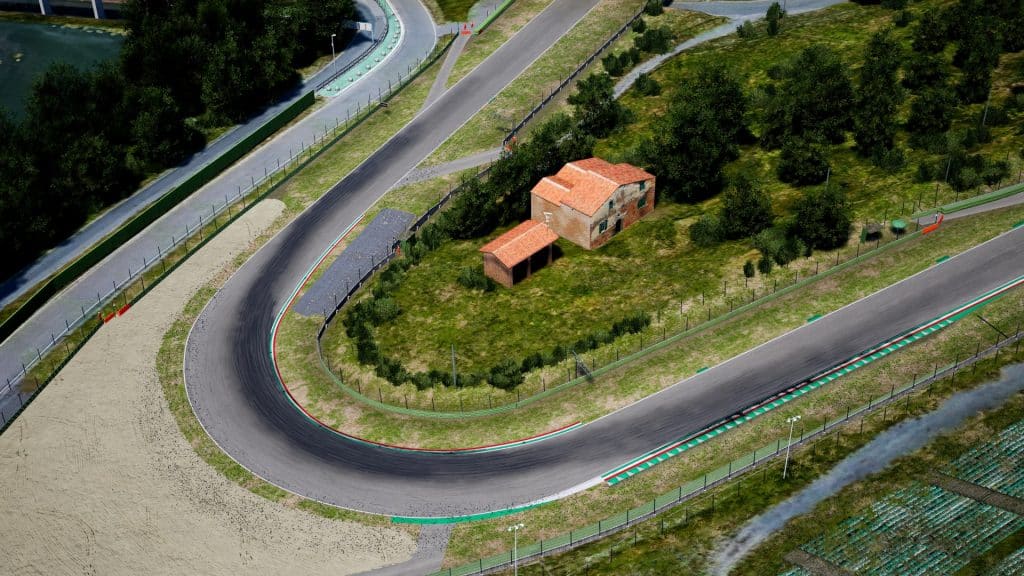
Turn 2,3 and 4 (Variante Tamburello)
After the left-hand kink down the start ad finish straight, which is classified as Turn 1, a medium-speed left into right chicane kicks off the lap at Imola. Precision and curb usage are both key before the chicane sequence ends with a fast left-hander which feeds into a short straight.
Heading into Turn 1, position the car over to the right-hand side of the straight. Keep your eyes focused ahead as you try to locate the first brake marker, which is just after the marshalling post signalled by an orange flash in the armco barrier alongside a small access road on the right.
From sixth gear, brake and shift down to second on the approach. Start to turn in just after your last gear change, as you’ll be aiming to get your inside wheels over the middle and last yellow sausage curbs on the inside.
Immediately get back on the power as you look to run the car over the next apex where, again, you’ll be aiming for the last two yellow sausage curbs. With the correct line, the second apex should be flat out. The key is to aim for a later apex, which will then stop you from running wide for the next corner which is also taken at full throttle. You don’t want to be past the middle point in the track as you come out the last part of the chicane so that the next corner can be taken flat out, which can be a challenge without a high amount of downforce in a GT3 car.
For the fast left-hander, run the inside curb, but not as heavily as you should in the chicane. Aim for a late apex and keep your steering inputs smooth to avoid scrubbing off too much speed.
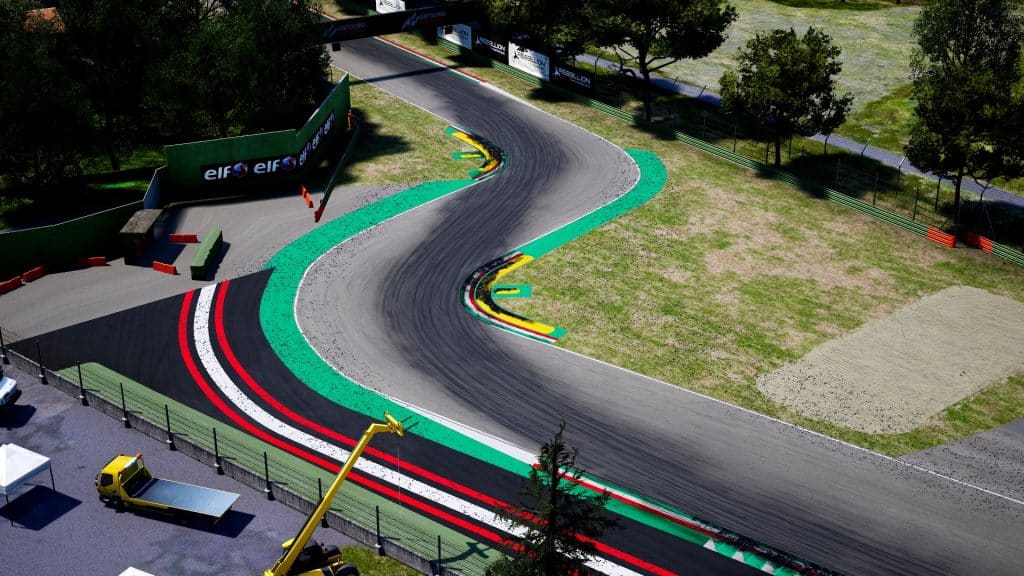
Turn 5 and 6 (Variante Villeneuve)
Turn 5 and Turn 6 is a quick chicane which starts with a high-speed, tricky left-hander where you’ll be scrubbing off the speed that leads straight into a slower-speed right.
The first part has a fast entry, so keep your focus ahead as you try to spot your entry point. Stay to the right until you reach the halfway point between the 100-metre and 50-metre boards and start to brake and change down to third as you start to turn in for the first apex. When turning in, aim to put your inside wheels over the entry curb, but transfer your weight carefully. Don’t flick the car in too hard, and try to complete the majority of your braking for Turn 5 in a straight line before corner entry.
Try and keep your car balanced and stable as you head into the next part of Variante Villeneuve. Straighten the wheel and shift down to second gear as you start to brake for the second apex. Keep in mind the ‘slow in and fast out’ philosophy for Turn 6.
Use all the of available curb on the inside, and get on the power as early as you can. There is a runoff curb on the outside which you can run all the way to the edge, but if you carry too much speed or were too tight to the inside on entry, you’re going to find yourself dipping your outside wheels in the gravel.
Turn 7 (Tosa)
Turn 7 is a slow-speed left-hand hairpin that leads onto another short straight.
Keeping to the right, brake just after the 50-metre board and shift down to second gear. You’ll be aiming for a mid to late apex, but stay close to the inside curb as your trail brake heavily, and get on the power as early as you can as the exit opens up.
Unwind the steering and let the car drift wide, using all of the available road on the exit.
Turn 8 and 9 (Piratella)
Turn 8 is a right-hand kink that leads into a medium-speed left-hand turn called Piratella. Coming over the crest, keep to the right and straighten your wheel as you head towards Turn 9.
Brake just after the 50-metre board and change down to third gear. There is a natural camber to the corner which tends to push the car to the outside, so turn in earlier than you think while carrying lots of speed in. You can use the green piece of the curbing but avoid using the sausage curbs in this corner, as it will unsettle your car at high speed.
Get on the throttle just as you clip the apex and use your momentum as you let the car run wide onto the exit curb. The only concern here is to keep your inside tires on the inside of the solid white line to avoid a track limits warning.
Keep your steering lock on as you’ll be coming back over to the left-hand side for the next sequence of corners.
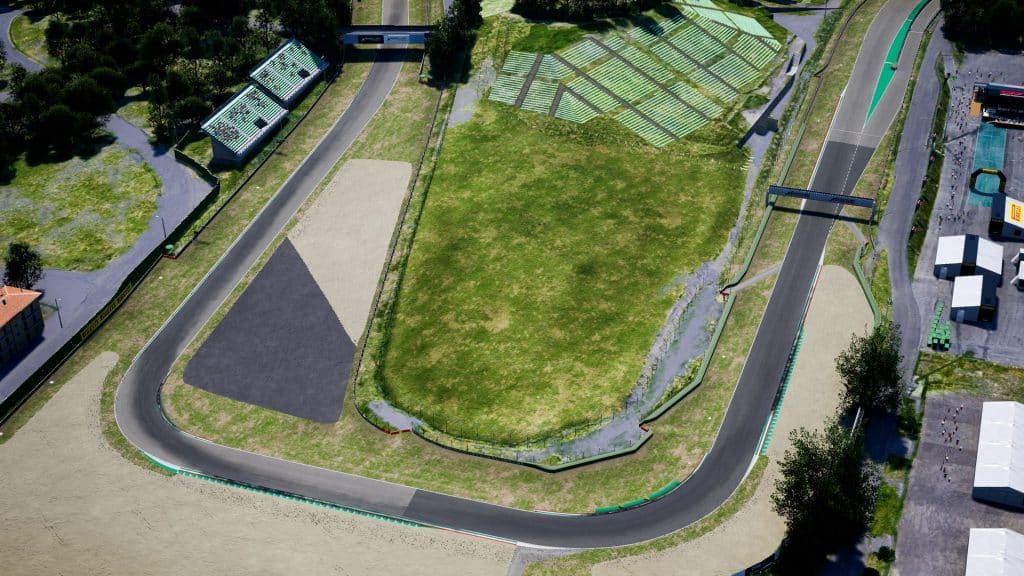
Turn 10, 11, 12 and 13 (Acque Minerali)
Coming out of Turn 9, you’ll be heading down through a left-hand kink – which is Turn 10 – and then into a very tricky sequence that consists of two tightening right-handers that lead into an uphill sweep to the left. Timing your downshifts and staying smooth on throttle, braking and steering inputs is key through this highly technical section.
Turn 11
Entering Acque Minerali, get over to the left and use the curb on entry to help open up the corner. As you leave this entry curb, roughly just before the 50-metre board, start to brake and shift down to third as you aim to clip the inside curb with your front right tire. Don’t turn in too aggressively whilst braking hard as the weight transfer may lead to your rear end rotating around you.
Just after this apex, get back on the power for a split second to help get the car settled. Run the car out to the exit curb which becomes the entry curb for Turn 12 as you try to straighten your steering wheel as soon as you can.
Turn 12 and Turn 13
Once straight, start to brake and shift down to second for the first apex of the chicane. The braking here is not your traditional hard braking, though. It is more about slowing the car down to the correct speed and easing the brakes so that you don’t cause any unnecessary weight transfers that can unsettle the car with all the direction changes and undulation.
As spoken about previously, slow in fast out is definitely the mentality to have here. It’s all about the corner exit which leads onto a short straight, so aim for a later apex. Overshooting on the brakes will cost you heavily, so rather brake early and get the car under control.
Once the car is settled, start to turn in and aim to run over the inside green part of the curb, but don’t run onto the inside sausage curbs. If you have your line right, you should be able to get hard on the throttle as you run over the first apex, and with the right trajectory, it will naturally take you out onto the left-hand apex without running wide and hitting track limits.
During the left-hand Turn 13, there are some yellow sausage curbs on the outside which must be avoided at all costs. Not only do they fall outside of track limits, but they cause the car to bounce around heavily and can end your race by putting you into a wall.
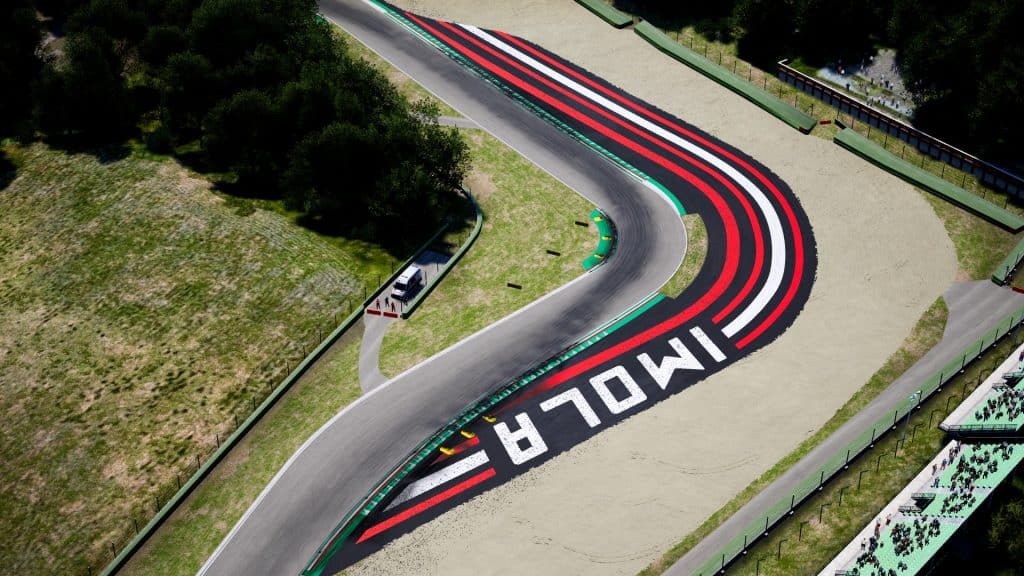
Turn 14 and 15 (Variante Alta)
Variante Alta consists of a tricky right-into-left chicane which is all about curb usage and maximizing the exit.
Heading down the straight after Acque Minerali, move over to the left for the entry of the chicane. Start to brake as the entry curb on the left begins. Brake hard initially, and shift down to second gear. Start to turn in just after you go under the sponsorship bridge.
At the first apex, get the entire car on top of the yellow sausage curb and use as much of it as possible. Then, get ready to quickly change direction as you turn to the left and once again aim to get right onto the yellow sausage curb. It will take time to get your line perfect for this flick without exceeding track limits, but overall, you want to use more of Turn 14’s apex curb than Turn 15’s.
As you climb over the second apex, avoid getting on the power too aggressively and rather be progressive and smooth with the throttle input so you can start to feed the throttle on earlier. This will give you the best traction as you run wide onto the exit curb.
The track limits are again the white line, so always keep your inside wheels just inside of this point. Note that it is super bumpy in this section due to the curb usage, so be smooth with the steering and think more about floating over the curbs instead of bottoming out over them.
Turn 16, 17, 18 and 19 (Rivazza)
Coming out of Variante Alta, straight line the not-so-straight straight and use as little road as possible as you head through the right-hand kink (dubbed Turn 16) which leads into Rivazza.
Kicking off the complex for real, Turn 17 is a very tricky downhill off-camber left-hander which then feeds into another slow left-hander that runs back onto the start-finish straight.
Coming through the downhill kink, position the car over to the right and use the Italian-themed entry curb on the right to help open up the corner entry. Keep an eye out for your braking marker which is just before the 100-metre board.
This is a very hard braking zone, so keep your foot planted on the brake as you shift down to second gear. Most of your braking will be done in a straight line, so only near the end of the phase should you start to turn in. Do so a bit earlier than you’d expect as the camber wants to carry the car out wide.
Aim to get your inside wheels over the apex curb and make sure to slow the car down all the way to the apex so that you can get on the power as early as possible.
The exit curb is very lenient here, and you’ll want to run the car all the way out onto it using the gravel trap as your track limits. Keep the power squeezed on as this will help you carry momentum into the final real corner of the track, Turn 18.
As the exit curb is about to end, turn in for Turn 18 and ease onto the brakes for the apex. Again, you must aim to get your inside wheel over the apex curbing and get on the power early to slingshot yourself onto the straight.
Use all of the exit curb on the right, while keeping just inside of that white line.
Coming out of the corner, stay to the right as you fire down the start-finish straight and through the kink of Turn 19 to complete a lap of Imola.