Oulton Park Circuit is a motor racing track located in Cheshire, England. Before we dive into our guide of the circuit, here are some facts and history about Oulton Park:
- The Oulton Park Circuit was opened in 1953, and its first race was the British Empire Trophy on 8 August of the same year.
- The circuit is situated in the grounds of Oulton Park, a country park and estate owned by the Gray-Egerton family.
- The circuit has three layouts: the International Circuit, the Island Circuit, and the Fosters Circuit. The International Circuit is the longest at 2.69 miles (4.31 km) and is in Assetto Corsa Competizione..
- The Oulton Park Circuit has hosted a variety of racing events over the years, including the British Touring Car Championship, British Superbike Championship, and the FIA GT Championship.
- Oulton Park has been the venue for many notable moments in British motorsport history, including the first-ever British GT race in 1993 and the final round of the British Formula 3 Championship in 2014.
- The Oulton Park Circuit is known for its challenging and technical layout, featuring fast straights, sweeping bends, and elevation changes.
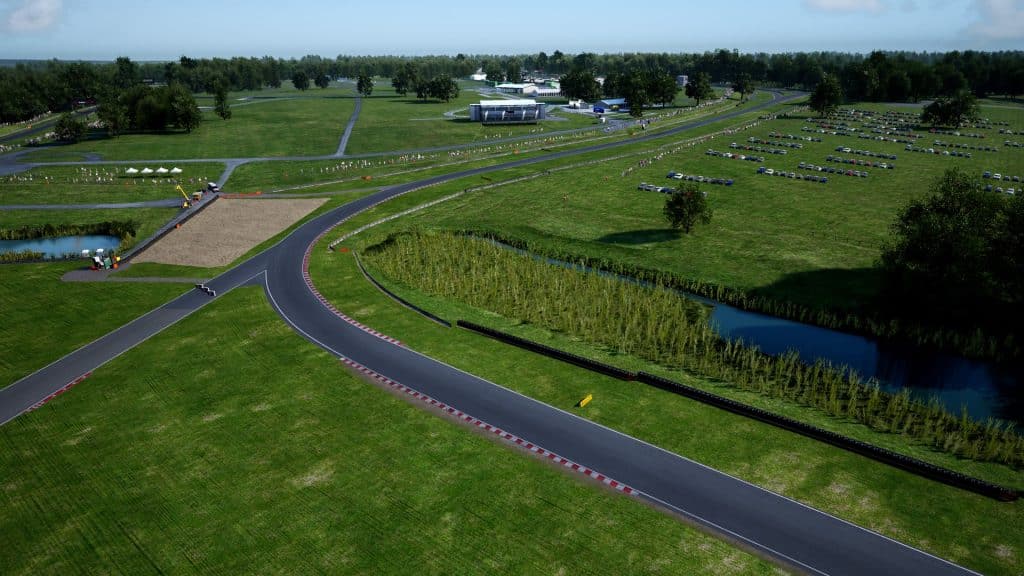
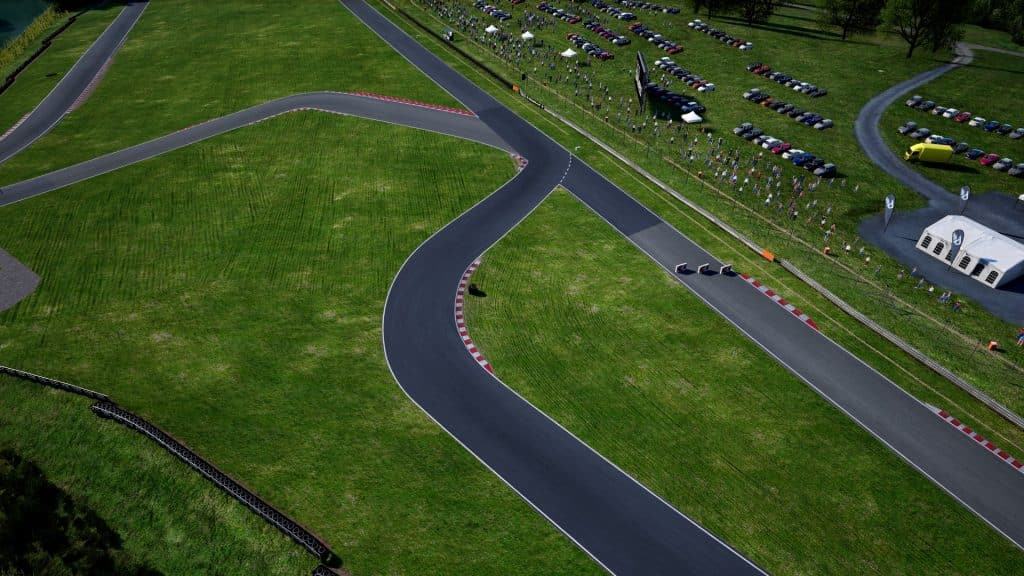
Turn 1 (Old Hall)
Approaching Old Hall Corner which opens the lap, position the car over to the left side of the track. Keep your focus far ahead to spot your braking point which is when the solid white line ends on the left-hand side edge of the track.
From fifth gear shift down to third as you turn in early to aim for the apex, which is between the two bollards that sit just next to the kerb. Patience is key here as it’s all about getting a good exit rather than prioritising the entry. You can put your inside front wheel onto the kerb, and as you reach the apex, start to apply the throttle.
Open your steering and use all of the exit kerb available. Track limits can be quite strict here so always keep your inside wheels on the inside of the solid white line.
Turn 2 and 3 (Denton’s and Cascades)
The right-hand kink of Denton’s is flatout but be careful not to get out of shape here. You’ll rather want to use the kink to position the car for the entry of Cascades. So keep to the right on the exit of the kink, to open up the entry of Turn 3.
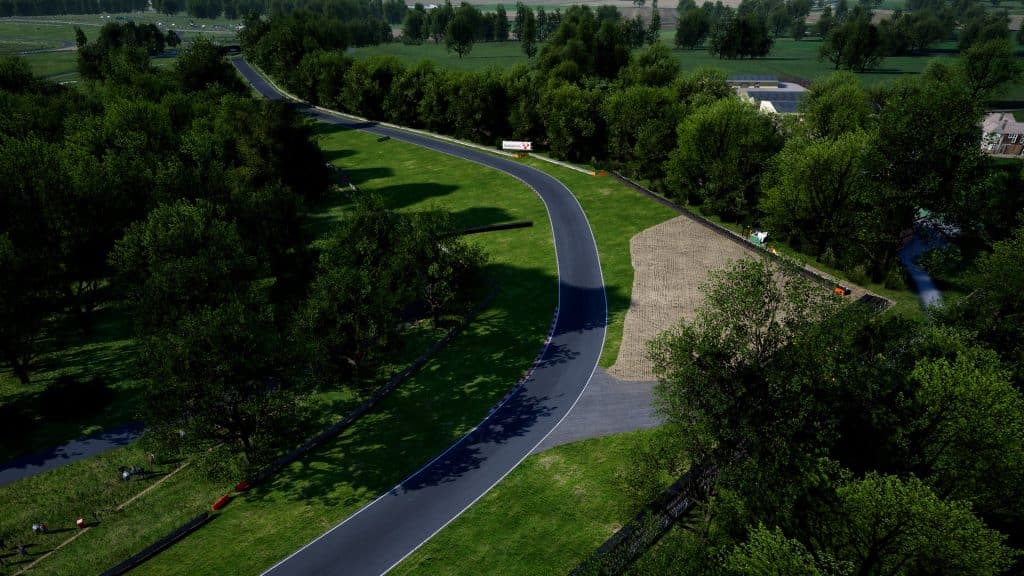
Cascades is a fast downhill left-hander that requires precision and patience. Entering the corner, you’ll want to be as far right as possible to open up the entry.
The braking point can be difficult to spot, but there’s a large dip in the road which is normally a good reference to use. At this point, get on the brakes and shift down 2 gears. As you start to brake, start to turn in gently and utilize the natural camber of the road. Due to the high-speed nature of the corner, any aggressive inputs will cause the car to lose grip.
As you feel the front of the car grip up, start to ease off the brake pedal. The apex point is the part of the kerb that’s closest to where the armco barrier ends on the inside. At this stage, the car should be loaded up, so get back on the power and let the car run out to the exit. The track limits here are far more lenient and you can use most of the matting beyond the kerb if needed.
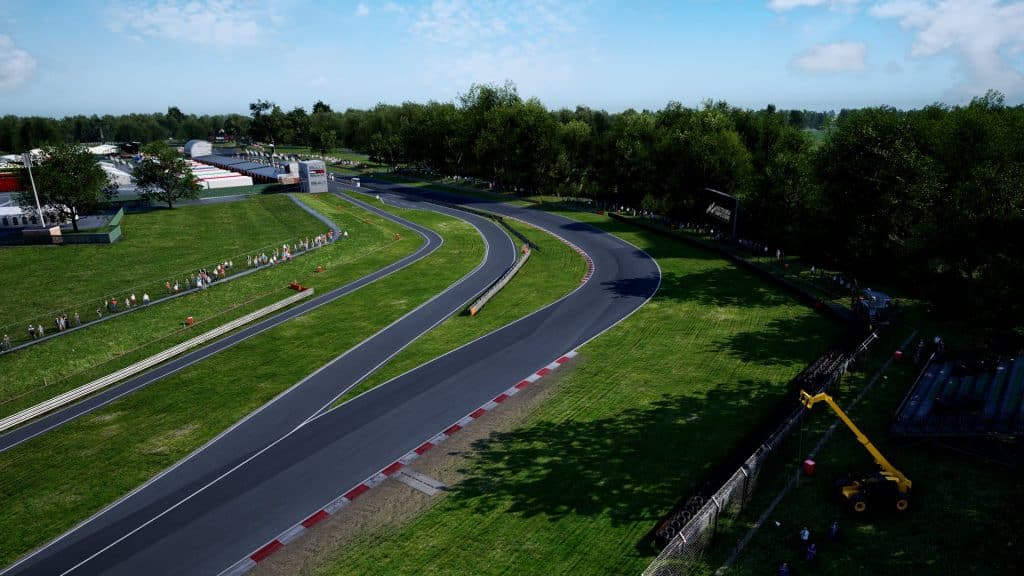
Turn 4 (Island Bend)
A super-fast left-hand corner, keep right on entry to Island Bend. As you pass the main access road on the right, start to turn in smoothly in order to not destabilise the car. As you approach the inside kerb lift off the throttle and if needed dab the brakes depending on which car you are driving or how stable your rear end is.
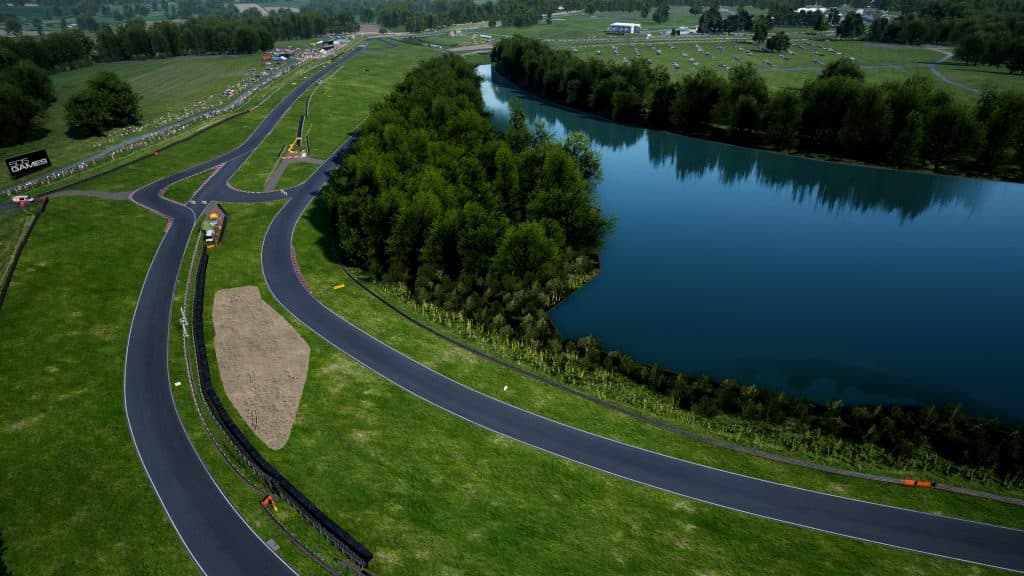
The inside kerb can be used with your inside wheels and as you get to the apex get back on the power. Don’t let the car run wide as you’ll need to come back over to the left to set up the entry for Shell Oils.
Turn 5 (Shell Oils)
Shell Oils is a highly cambered double apex right-hand hairpin. On entry, keep the car to the left and look ahead for your braking marker.
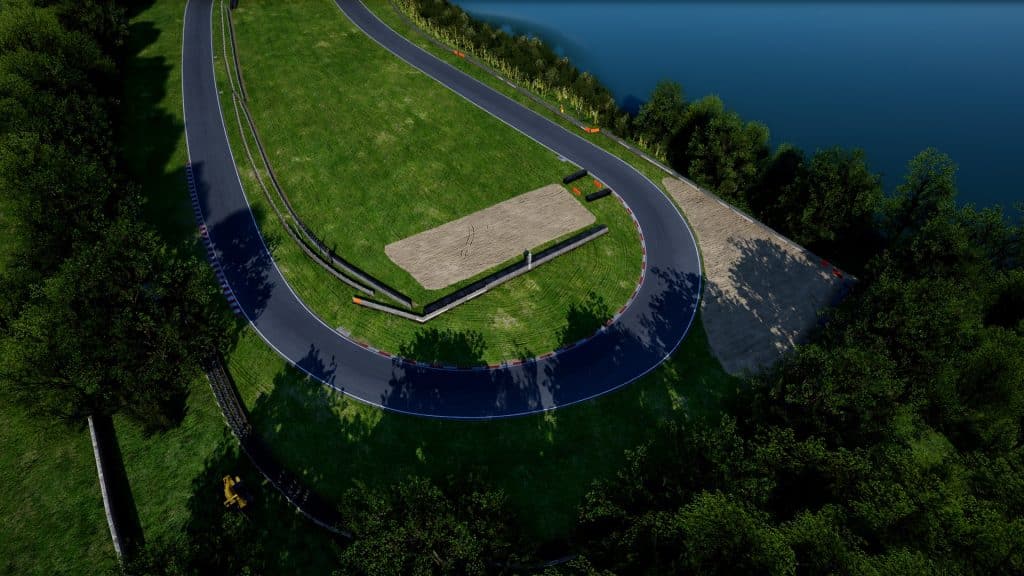
As the road straightens, there is an orange marshall point on the outside armco barrier. Use the first orange block that you see and brake hard down into second gear. Turn in early and touch the kerb initially as you use the camber of the corner to carry momentum, then allow the car to slightly drift wide in the middle of the corner as you wait for it to rotate.
Get back on the throttle just before you reach the second apex. This will slingshot you out as you open up your steering to use the available road on the exit.
Turn 6,7,8 and 9 (Britten’s)
Next up is a tricky chicane sequence that leads onto the long back straight.
The sequence starts with a right-hand kink that’s taken flat out. Keep right as you prepare for the entry of the chicane which is a left-hand turn. Heading into the braking zone, look out for a small grey concrete patch on the grass located on the right-hand side of the track. Brake just before this and shift down to second as you trail brake into the first part of the chicane.
Kerb usage here all depends on the car you are driving. If you are in a car that absorbs kerbs easily then aim to put your left front wheel completely over the left-hand kerb as you continue to trail brake. As you cut the first kerb, look ahead to the next part of the chicane which is a right-hander. The direction change here is very quick so you need to anticipate this weight transfer before you enter the chicane sequence.
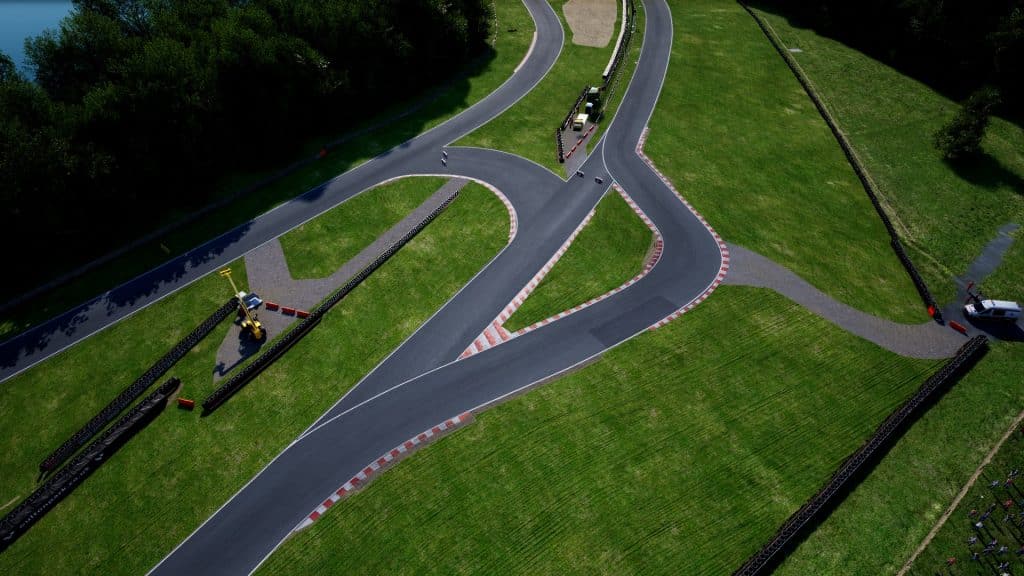
For the right-hander, aim to get your inside wheels over the inside red and white kerbing – too little kerb and your wheels will crash into its edge but too little and you will hurt your exit speed.
As you pass this apex, start to progressively get back on the throttle to maximize your exit. This will naturally take the car out to the last part of the chicane which is another left-hander. The matting and kerb on the left-hander can be used again depending on your car’s ability over the kerbs.
Continue to run the matting and cut the left-hand kerb as you exit the chicane sequence. This will straighten out the last corner and increase your exit speed. Let the car run out to the right as much as possible.
Turn 10,11 and 12 (Hislop’s and Knickerbrook)
Next up is another chicane sequence. This time you’re going to be attacking a right, into a left followed by another right which ends the sequence.
Drift left heading down the straight as you prepare to start braking for the entry of the chicane. Looking ahead, spot your brake marker: the green marshall hut located on the left of the track. It’s approximately just after the “1” braking board.
Brake hard in a straight line and downshift quickly to maximise engine braking. Aim for second gear and start to turn in as you pass the black sponsorship board on the left guardrail, then use the flat part of the red and white kerb as you hit the first apex.
If you’ve carried the right amount of speed into the first half of the chicane, you should find yourself in the middle of the road and positioned for the next apex which comes at you fast. Flick the car through the left-hand turn again aiming to use the inside kerb. Watch out for the tyres dipping just inside of the kerb. Be patient with the throttle at this stage as you don’t want to drift the car out wide for the next corner.
The goal on exit here is to get the car back over to the left at least halfway between the exit of the chicane and the next right-hander. Just after this point, start to turn in to make the apex for Turn 12. Aim to get your front right tyre over the kerb while slightly dabbing the brakes.
Just after you hit the apex, start to get back on the power and open up your steering. Let the car run out to the exit kerb but be careful you don’t use it too aggressively as it does tend to bite back.
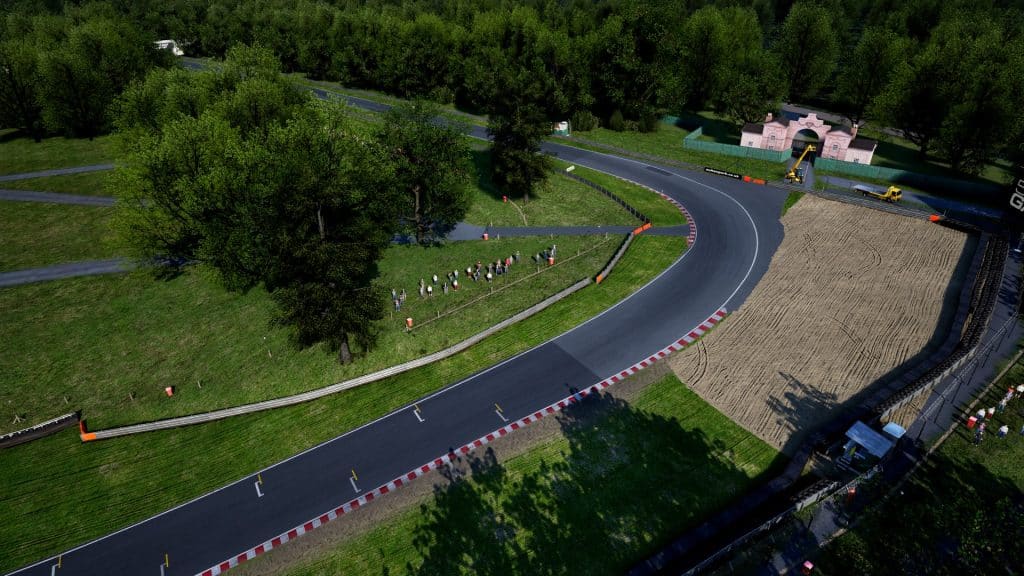
Turn 13,14 and 15 (Clay Hill, Water Tower and Druids)
Clay Hill is an easy uphill, flat out left-hand kink that leads into a short straight before Water Tower and Druids. One thing to note though is that the road bends left after the uphill kink so make sure to hit a late apex around the middle point of the inside kerb, which will stop you from running out of road on the exit.
Keep left as you pass through the final left-hand kink of Water Tower. Staying left here allows you to open up the entry of Turn 15. Start to brake as soon as the car straightens up. Change down to third gear as you aim to hit the apex at the first kerb.
As you pass that first apex, let the car coast as you try to set up your second apex and corner exit point. The car will naturally drift a little bit wide with the momentum you are carrying. As soon as the front end has gripped up and you know you can hit the second apex without running wide, get straight back on the power; carrying the right amount of speed into the first apex without compromising your exit is a careful balancing act.
Open up the steering on the exit and use the kerb to maximize your speed down the next straight which is one of Oulton Park’s few overtaking spots.
Turn 16 and 17 (Lodge Corner and Deer Leap)
Lodge Corner marks the last real turn on the circuit. On paper, it looks like a simple 90-degree right-hander, but in reality, it’s actually a very technical corner. The elevation changes also make it a lot more difficult to navigate.
On entry stay, to the left and use the white corner board on the left as your braking reference. Brake hard as the road goes downhill initially and shift down to second gear. Turn in a bit earlier than you think as the road goes uphill towards the apex. Aim for a late apex as you try to get your front right tyre onto the inside kerb, roughly halfway between the two bollards just like in Turn 1.
From here, keep your steering smooth as you progressively apply throttle and run the car wide onto the exit kerb. The camber of the corner can cause some oversteer on throttle so be aware of this. The kerb can be used but be wary of the matting beyond it as using it will mean you have exceeded track limits.
With Lodge Corner complete, power up the hill and hug the inside line through Deer Leap which is the final left-hand kink onto the start finish straight. This concludes a lap of the Oulton Park International Circuit.