So you’ve just unboxed your new wheel? Or maybe you’ve been a long-time Thrustmaster user and are looking to find the best settings for the TSPC Racer to make you faster and more consistent. In any case, this guide will cover the initial set-up process for the Thrustmaster TSPC Racing wheel. It will cover the first-time setup, how to connect to the game and some recommended setting changes within Assetto Corsa Competizione itself.
Step 1: Wheel set up
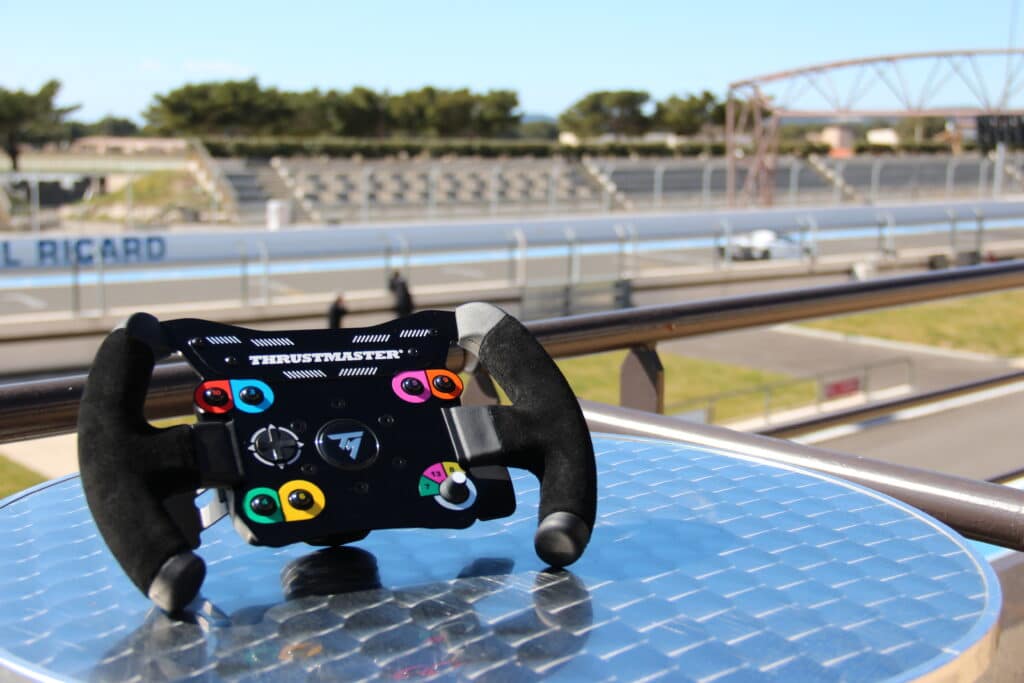
When opening the box, ensure you have; The Wheelbase, Pedal set, Power supply, and various Cables in order to begin the setup process. First, we will want to connect the detachable wheel to the base. To those of you who are more experienced with the Thrustmaster product range, there are a number of different wheel types compatible with the TSPC to suit a variety of driving styles. These include:
- Ferrari 250 GTO Wheel
- Ferrari 488 Challenge Wheel
- Ferrari 599XX EVO 30 Alcantara Edition
- Ferrari F1 Wheel
- Ferrari GTE 458 Challenge Edition
- TM Leather 28 GT Wheel Add-On
- TM Open Wheel Add-On
- TM Rally Wheel Add-On Sparco® R383
- TM Competition Wheel Sparco® P310
- Thrustmaster Formula Wheel Add-On Ferrari SF1000 Edition
All of these wheels will follow the same basic setup process and the differences will arrive once you begin to use the software. To connect the Wheel, make sure both the base connector arrow and wheel connector arrow are pointing upwards. Then slide the wheel into the base making sure the pins connect fully and everything has lined up correctly. After this, you must tighten the quick-release system – the easiest way to do so is to hold the rotating ring and turn the wheel clockwise until the ring is tight. Now there is one final step to rotate the wheel 180° and tighten the screw to fully secure the wheel using a screwdriver or similar.
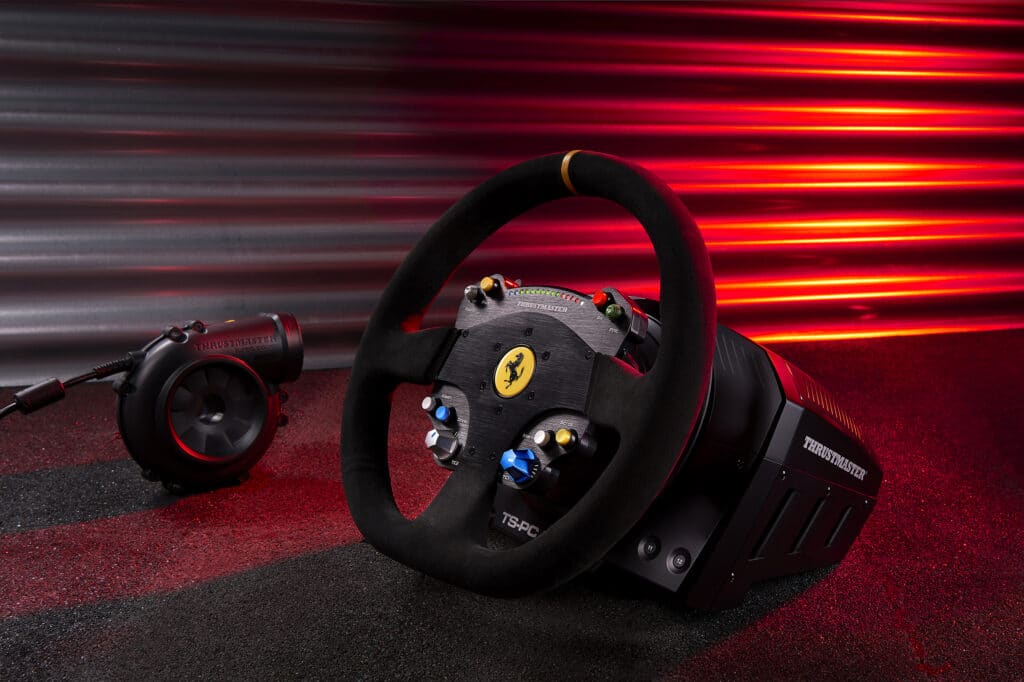
Now we can connect the USB cable, pedal cable, and power supply all to the back of the wheel. You will want to do this step before attaching the wheel to your desk or sim rig as this can be a little more difficult. As we have all the connections in place, you can attach your wheelbase to your rig of choice using the bolt patterns found on the bottom of the wheel or to the desk using the provided clamp. In the event that your rig is not naturally supported, you may also find the drilling templates on the Thrustmaster Support Site.
The pedal set has a similar pattern to allow fixing to a sim rig but will not have any additional features to stop sliding on the floor. If the pedal set is placed on the floor it is recommended to use rubber pads you can stick to the bottom and place against a wall to stop any movement while driving.
Once this is complete we can begin the setup process on your PC, it is worth noting no matter the device you intend to use the wheel with it is recommended to begin the setup process by connecting to a computer and updating drivers and firmware.
Step 2: Wheel settings and Drivers
Firstly, you should navigate to the Thrustmaster wheel support site to locate the download; “PC – DRIVERS FORCE FEEDBACK”. Before this is installed make sure the wheel has not been connected to the PC, as we will do this in a later step. Once you click “install”, follow the process on screen, and once complete, choose the “restart” option as this is required before any wheel is set up.
Now, connect your USB to the PC and allow the wheel to calibrate through its’ rotation process. Once the device has been recognised, locate the Thrustmaster folder in your program list and open the “control panel” option. This will present a control selection window where you will highlight the TSPC wheel and select the properties tab. A control panel will now be on screen with all the required functions and settings for you to set up the wheel.
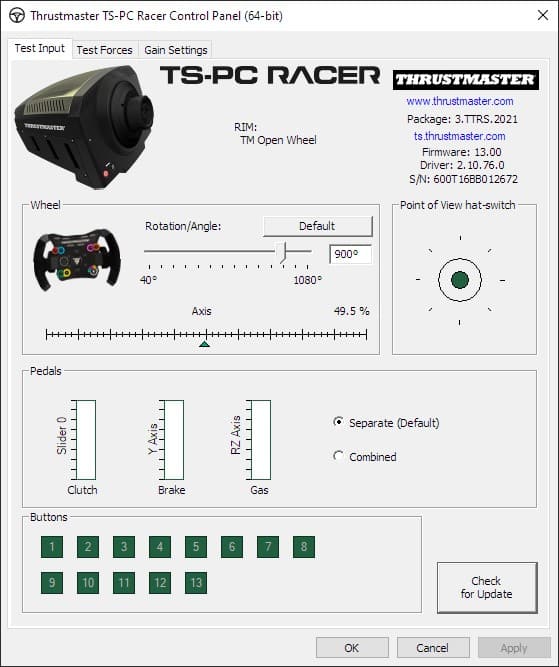
Before any setting adjustments are made locate the “check for update” button and run this process, this will update any drivers or firmware required for the wheel. It is vitally important this is done as the wheel may not function correctly or to its optimal potential if not.
Step 3: Wheel adjustments
Now that the wheel has been updated, we can begin to set up the wheel for racing. Firstly, we want to make sure all the functions act as they are designed to. Here is a checklist of functions to test
- Full wheel rotation axis input.
- Pedal axis has 100% input on all pedals.
- Buttons and hat-switches all correspond to individual actions.
With all this working we now want to set the wheel rotation value to 900⁰ as this will allow all cars in ACC to have a 1:1 visual rotation in-game with what you input to the wheel.
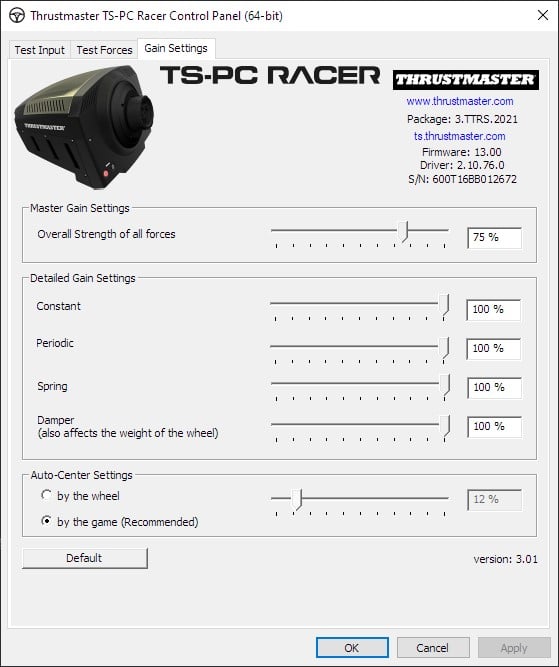
The next step of the setup process is to adjust the wheels’ FFB output in the “Gain” settings tab. In this tab, you will find a number of different settings you can adjust that will affect the strength and behavior of the FFB in the system settings of the wheel. Most of these settings will be set to their max output as much of this is controlled in-game. Recommended settings for these parameters are
- Overall Strength of forces: 75%
- Constant: 100%
- Periodic: 100%
- Spring: 100%
- Auto centre: By the game
Step 4: Launching ACC
Now you are ready to launch ACC through Steam, make sure the wheel is still connected, and plugged in or the game may not recognise the wheel device. Once the game has booted up the wheel should now be able to control the menu features through the d-pad or hat-switch and face buttons.
The first place you should navigate to is the “Settings” menu then “Controls” where you will adjust your in-game wheel settings. Initially, make sure the selected “Driving Control” is set to the “Wheel” category.
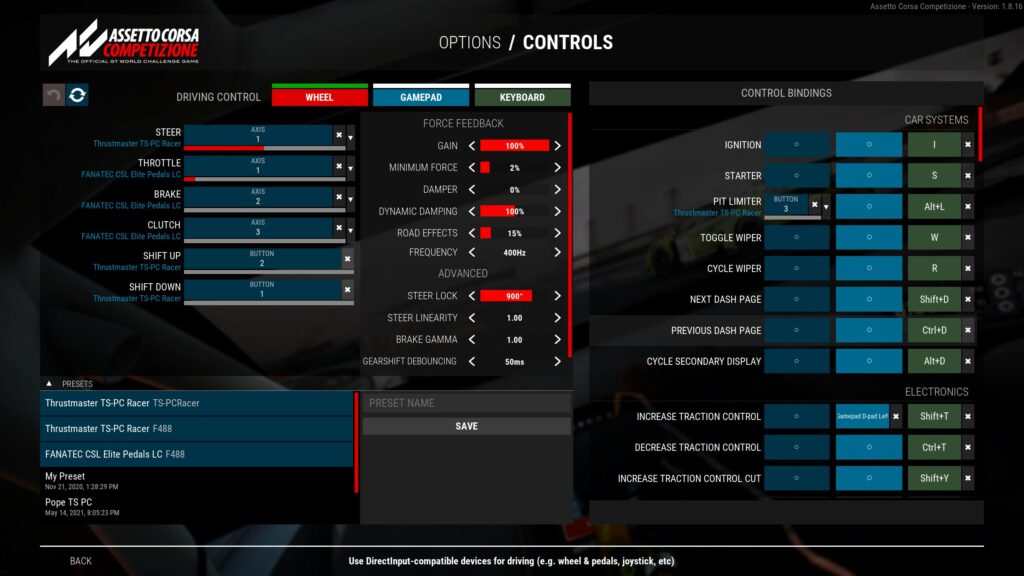
Draw your attention to the right-hand side column and move your wheel and engage each pedal looking at the red bar below to indicate all is being registered as expected. If so we can now move onto the next step. If you have issues at this stage, ensure that all cables are fully connected, with a PC restart also being conducted to ensure any firmware changes are completed.
Step 5: Force Feedback (FFB)
One thing to note about FFB settings is that the figures you will see are subjective and what may be good for some may not be for others. Here is a brief overview of each setting to give you a basic understanding of how these changes will affect your wheel:
Gain is the overall strength of the force feedback that the wheel will output.
Minimum force is a feature best used on wheels such as the T150 due to the weaker nature of the FFB. This feature will also help compensate for the dead zone at the centre of the wheel.
Dynamic damping controls the weight of your wheel while driving and will vary directly with your speed.
Road effects will send an additional FFB effect to your wheel mimicking the forces felt through the car due to the road surface.
With that being said, Coach Dave Academy’s own Josh Martin – an experienced Esports competitor and Thrustmaster ambassador – has provided his recommended settings from his many hours of experience.
Force Feedback
- Gain: 100%
- Minimum Force: 2%
- Damper: 0%
- Dynamic Dampening: 100%
- Road Effects: 15%
- Frequency: 400Hz
Advanced
- Steer lock: 900⁰
- Steer Linearity: 1.00
- Brake Gamma: 1.00
- Gear shift Debounce: 50ms
One final step before jumping into the game is the adjustment of key bindings. Under the heading “Control Bindings” you will see the range of functions you can adjust using your wheels buttons. To assign a button to a function select the desired feature and press the button you wish to perform this function. Any remaining functions unassigned can be assigned to key bindings using the final column.
Now your new Thrustmaster TSPC wheel is set up and you are ready to start racing. However, if you are looking for other wheels, we have detailed guides on what the best Xbox wheels, Playstation wheels and Direct Drive wheels are all for your benefit.

